Sharpness
It is almost never the lens at fault
When you have a blurry or fuzzy picture, it is so easy to blame the lens. After all many reviews compare the sharpness of lenses all the time. Speaking from experience, it is very rarely the lens at fault.
See also my very amateur sharpness test for a longer discussion
There are a couple of reasons why your image is blurred (opposite of sharp) in order of importance:
- Movement, either you or the object moved during exposure. This creates a blur. You can decrease the exposure time, hold the camera (or the object) still or use a tripod
- Out of focus, not all of your picture is in depth of field due to the aperture and the focus you have. Note that fast lenses may have very small depth of field making it very difficult to keep everything in focus.
- Environment, the light is an important contributor to the sharpness, both direct and indirect (well lit scenes can be exposed faster). Similarly the clarity of the air between the lens and the object will contribute as well. This is especially true for landscape shots using long lenses.
- Diffraction limits is a physical limitation that gets worse with smaller apertures. Basically the problem is that light falling on your pixel will have an airy disc shape and will spill over and contribute to neighboring pixels. This gets worse as you the aperture gets smaller.
- Lenses, they are not perfect and they will create various non-idealities that will contribute to blur your images. Usually the goal is to limit these problems to the edges and corners of the frame. Zooms that cover a wide focal length range have to optimize many different parameters (cost/weight) and can have issues at various focal lengths.
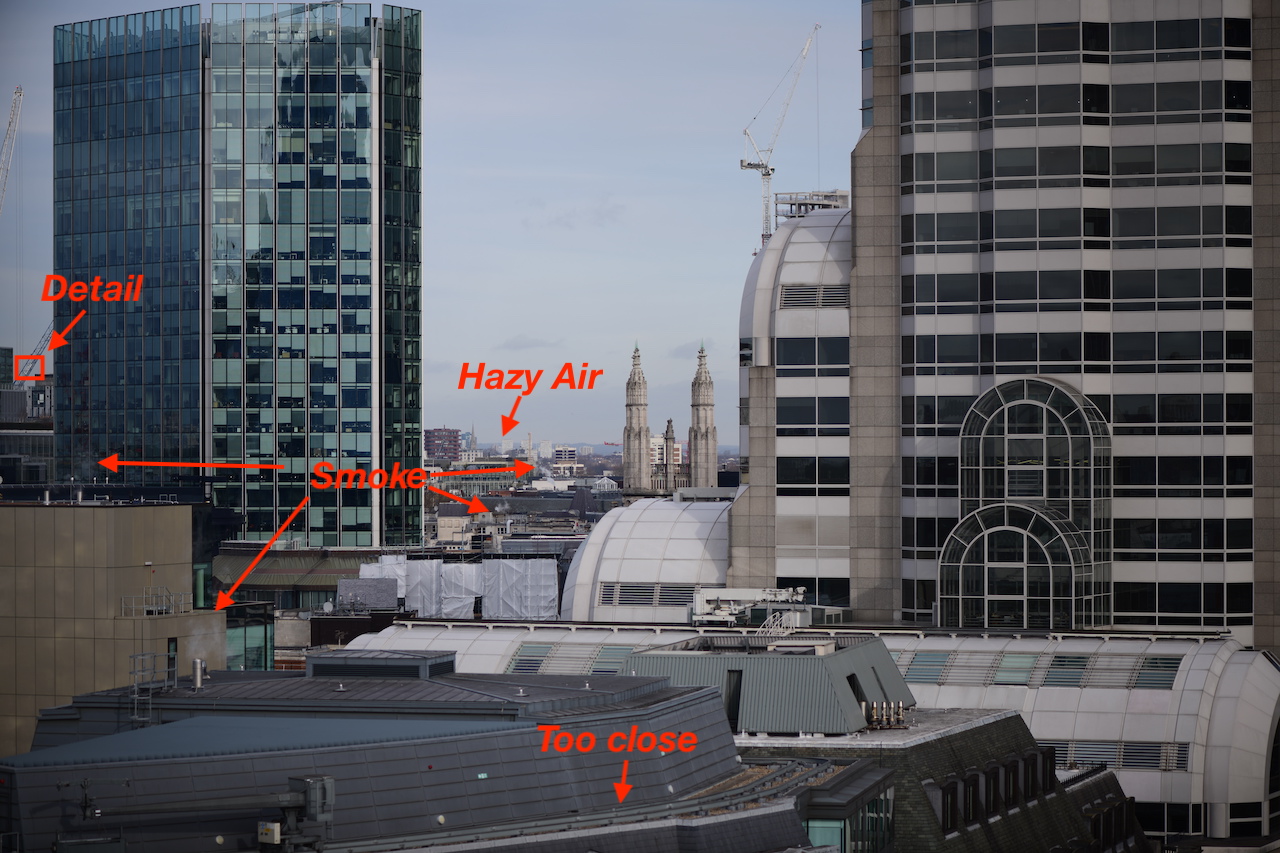
The picture in this section is taken with a Nikon 105 on a Nikon D850. This is not a particularly sharp (or good) picture, but highlights a lot of issues that will haunt you. The lower half of the picture contains a roof part that is too close, and is therefore slightly out of focus. The air (in London) was not particularly clear, the building in the distance started to disappear in the haze, and there are plenty of chimneys that expel hot air and vapour which blurs parts of the image. There is a tiny cut out 160x100 pixels on the left side of the image, which shows actually how sharp the lens is. So anything that is blurred here is not really due to the lens.
You need to look really close to see these issues
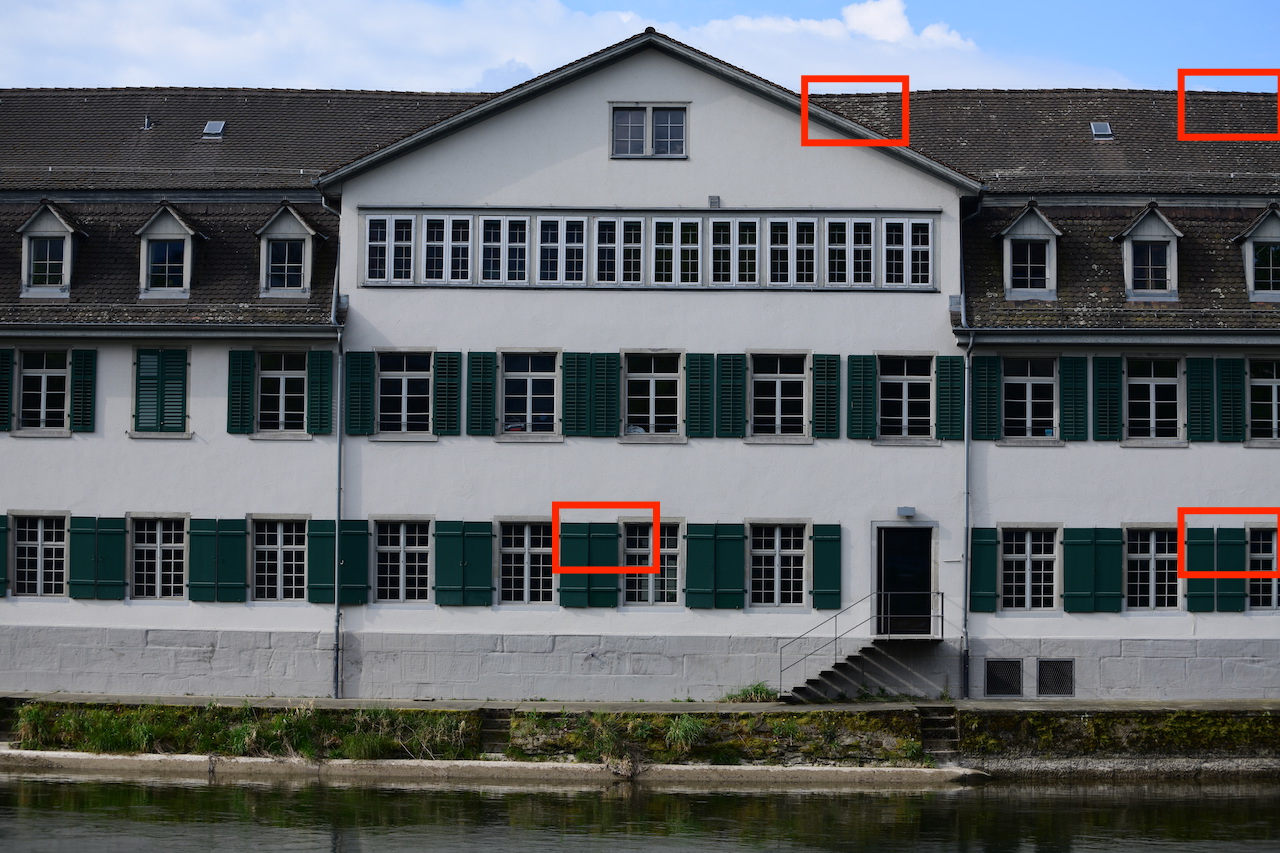
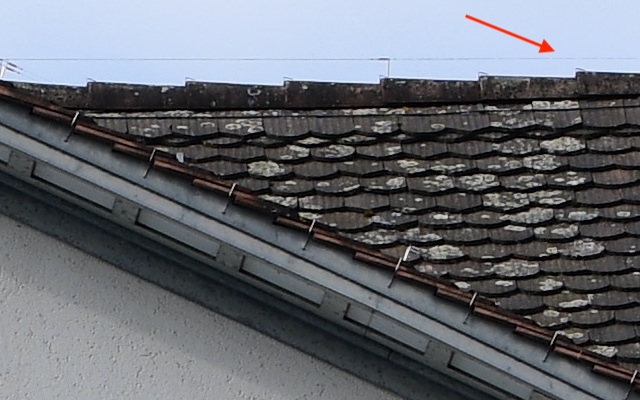
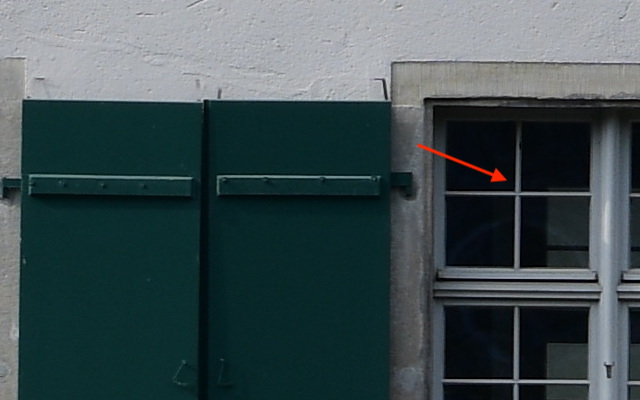
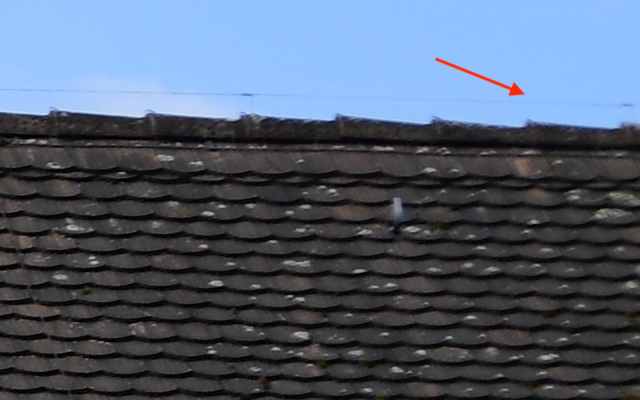
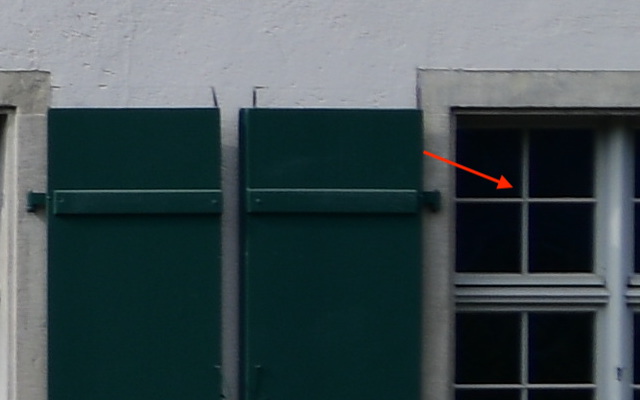
Here I have an example to illustrate what is happening, it is a head on shot using Nikon 70-300 of a house in Zurich, in decent light using a Nikon D850 with 45 Megapixels resolution. The image on this www site has been scaled down to 1280x853, and it should look quite OK when you are viewing it on a computer. Below there are two sets of crops of 640x400 pixels, this is about 0.5% of the image.
You can see that the center of the image is better defined while the sides/corners have gone soft. This is actually the issue of this lens at this focal length 70mm and aperture f/5.6, and it takes a lot of effort to highlight this issue. In practice you will be bothered by such things only if you zoom like crazy on all our pictures, use the largest possible aperture or you end up making pictures of large flat surfaces (i.e. maps on walls).
Notice that for most of the time, you will not be looking at your pictures that closely. For this www site, I have pictures at 1280x800 resolution which is pretty decent for most computers, tablets and smartphones where you are viewing it. Scaled to this resolution you will not see any of these issues. So take these sharpness issues with a lens with a grain of salt.
What can you do?
- Hold your camera steady and relax. Consider using a tripod or a beanbag to stabilize the camera.
- Use a fast enough exposure time. Rule of thumb is that you should at least use 1/
focal length. That also depends a lot on you, you might have a calmer hand, or the weight of the equipment (it is much harder to hold still a 3kg camera/lens combination than a 500g one). But the general idea applies: If you use 2x longer focal length consider having 2x more exposure time than what worked you before. - Various vibration reduction systems can compensate a bit for the speed.
- The easy way out is to increase the ISO and keep the exposure high enough
- Lenses tend to be sharper between f/5.6 and f/11. They are (usually) less sharp on larger and smaller apertures. If you go smaller, it is the diffraction that will get you, if you go larger, also the depth of field will become an issue.
- Clear air and lots of bright light always helps
- It is very uncommon to take head-on pictures where people will be interested in the sides and corners (where sharpness is an issue).
- Your lens will hardly be the issue. But technically prime lenses will be sharper, as they have a fixed focal length for which they can be more easily optimized.
These pages are for Amateur Photographers and not really for seasoned photographers and professionals. I have no affiliation or commercial interest with any brand/make. I write from my own experience. I ended up using mainly Nikon, so I am more familiar with this brand than others. See price for notes on pricing as well as photography related links.
