Depth of field: Difference between revisions
(Created page with "{{photonavbar}} class=img-responsive <div class="jumbotron"> == Controlling what you see == The aperture allows us to keep part of the picture...") |
No edit summary |
||
| (One intermediate revision by the same user not shown) | |||
| Line 10: | Line 10: | ||
<div class="panel panel-success"> | <div class="panel panel-success"> | ||
<div class="panel-heading">''' | <div class="panel-heading">'''Separating things'''</div> | ||
<div class="panel-body"> | <div class="panel-body"> | ||
While [[aperture]] is a technical setting of the lens, it is one of the primary tools to make a statement. If you have a lens that is wide open (large [[aperture]]) you collect a lot of light, but this comes from a narrow region around the plane you have [[focus|focussed]]. Everything else appears blurred. You can use this to your advantage and emphasize part of the photograph that you want to ''stand-out''. Portraits are the ''best'' example of this. In a ''good'' portrait you want the face of the person to be in [[focus]] and the background has to blur away. | While [[aperture]] is a technical setting of the lens, it is one of the primary tools to make a statement. If you have a lens that is wide open (large [[aperture]]) you collect a lot of light, but this comes from a narrow region around the plane you have [[focus|focussed]]. Everything else appears blurred. You can use this to your advantage and emphasize part of the photograph that you want to ''stand-out''. | ||
Portraits are the ''best'' example of this. In a ''good'' portrait you want the face of the person to be in [[focus]] and the background has to blur away. | |||
[[File:deer.jpg|class=img-responsive]] | [[File:deer.jpg|class=img-responsive]] | ||
the simple trick is keep the aperture large, and position the person further away from the background. | |||
It is not always a desired effect. Sometimes, you have to be aware of this and select your settings that you get what you want. The typical issue that comes as an [[Amateur photography|amateur photographer]] is trying to take a picture of someone in front of a landmark (say pyramids). You essentially have two options: | It is not always a desired effect. Sometimes, you have to be aware of this and select your settings that you get what you want. The typical issue that comes as an [[Amateur photography|amateur photographer]] is trying to take a picture of someone in front of a landmark (say pyramids). You essentially have two options: | ||
* use a very small aperture so that everything is in [[focus]]. As you decrease the [[aperture]] you will have to compensate with [[exposure]] and/or [[ISO]] for the loss of light coming into the camera. | * use a very small aperture so that everything is in [[focus]]. As you decrease the [[aperture]] you will have to compensate with [[exposure]] and/or [[ISO]] for the loss of light coming into the camera. | ||
Latest revision as of 21:55, 11 February 2021
Controlling what you see
The aperture allows us to keep part of the picture sharp in focus, and separate it from the background that appears blurred. This is due to field of depth. Depending on the aperture and distance, the part that is visible can be tuned to our liking.
While aperture is a technical setting of the lens, it is one of the primary tools to make a statement. If you have a lens that is wide open (large aperture) you collect a lot of light, but this comes from a narrow region around the plane you have focussed. Everything else appears blurred. You can use this to your advantage and emphasize part of the photograph that you want to stand-out.
Portraits are the best example of this. In a good portrait you want the face of the person to be in focus and the background has to blur away.
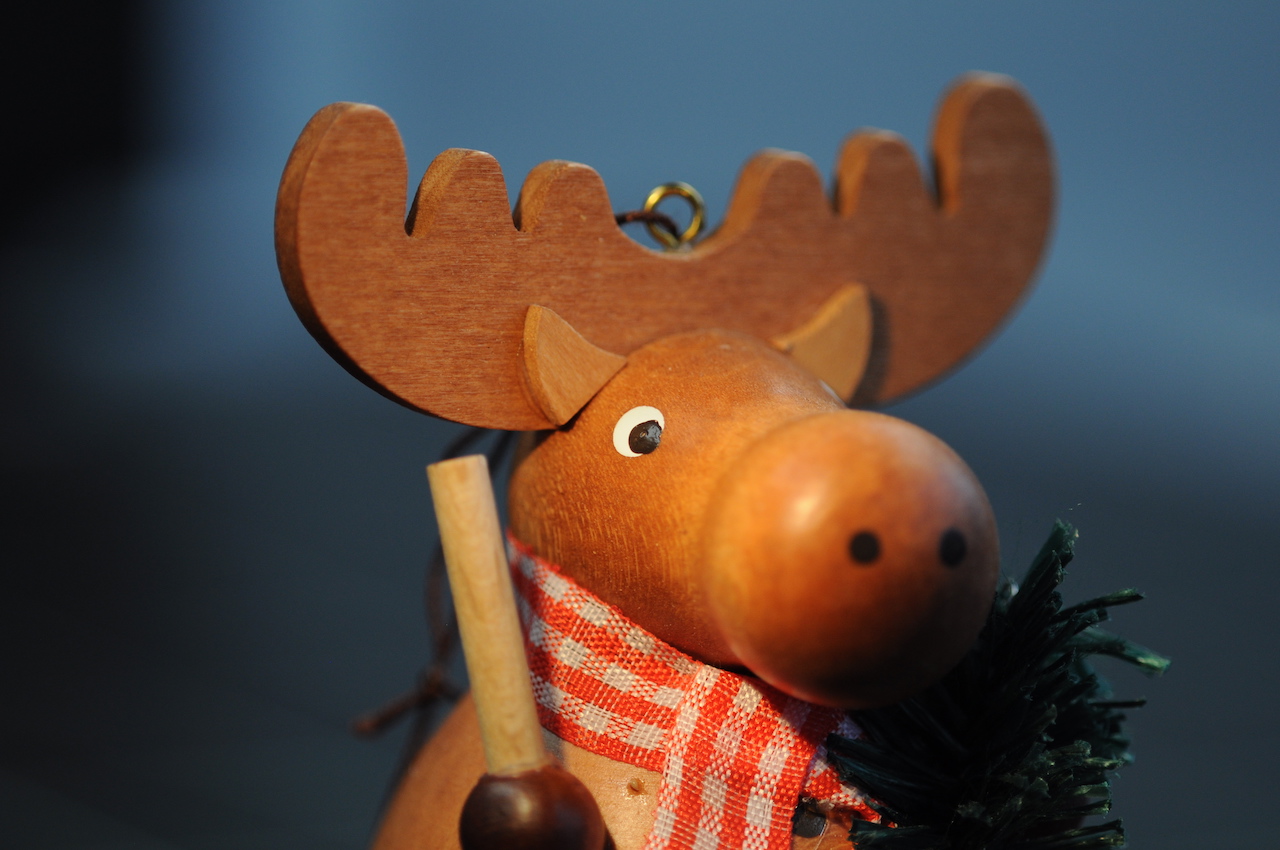 the simple trick is keep the aperture large, and position the person further away from the background.
It is not always a desired effect. Sometimes, you have to be aware of this and select your settings that you get what you want. The typical issue that comes as an amateur photographer is trying to take a picture of someone in front of a landmark (say pyramids). You essentially have two options:
- use a very small aperture so that everything is in focus. As you decrease the aperture you will have to compensate with exposure and/or ISO for the loss of light coming into the camera.
- Try to position yourself quite a distance (8-10m) from the subject so that the background is in focus even at a (relatively) large aperture. This is one of the reasons why longer lenses are so beloved.
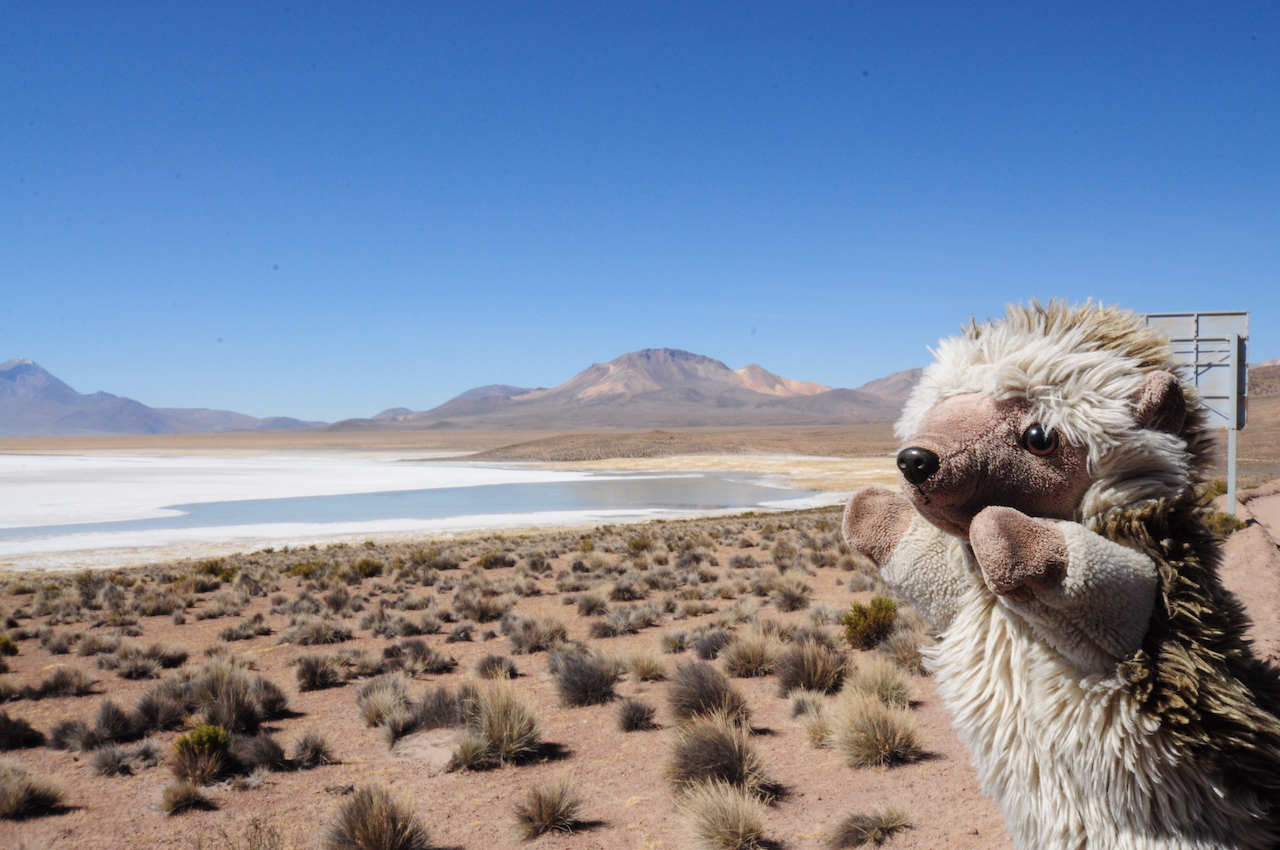 In this example I used f/29 to get things a bit into focus. Since it is a very bright day, I got away with this. Having the furry hedgehog a meter away would have made it much easier.
Here I have a picture with aperture f/3.5, focus is on the eye (as probably should be), but the nose disappears.
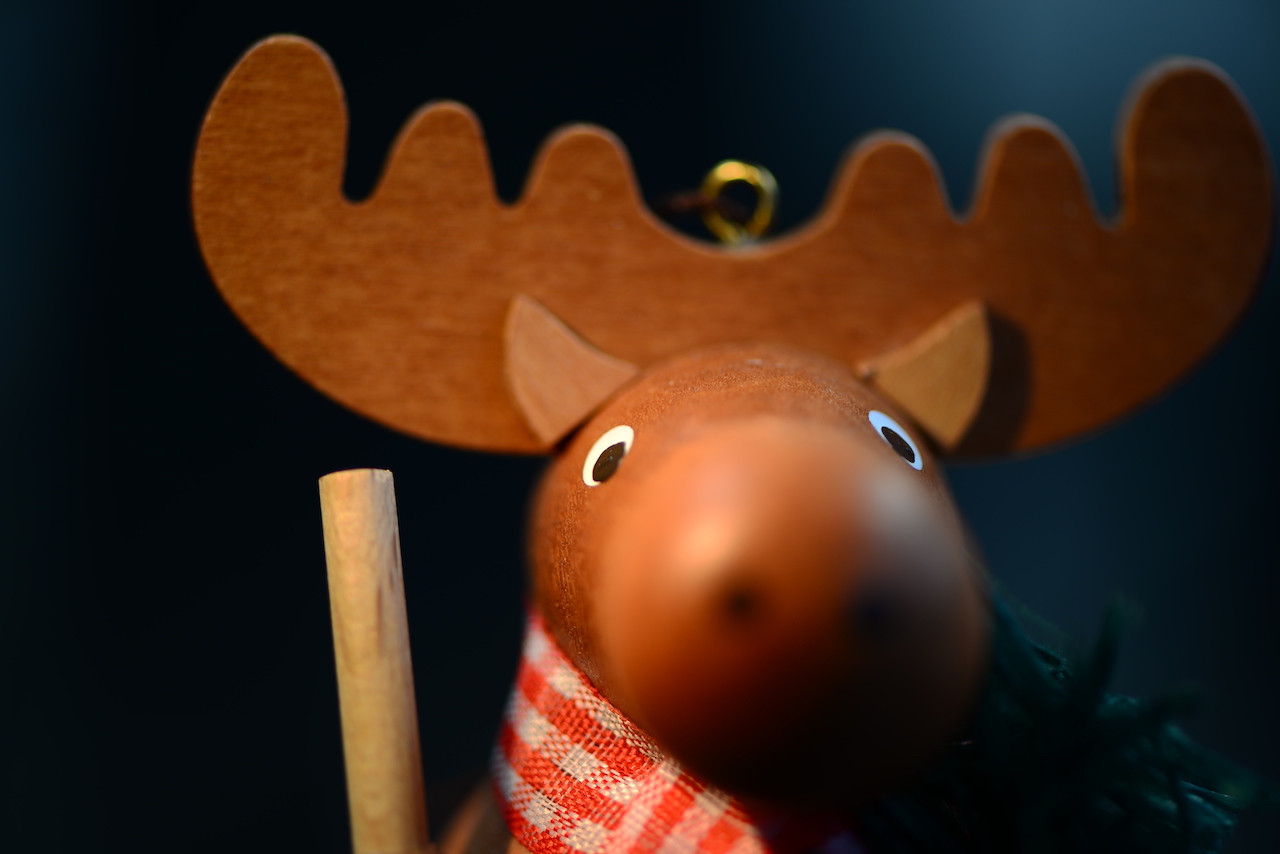 Here is same aperture, but this time focus is on the nose.
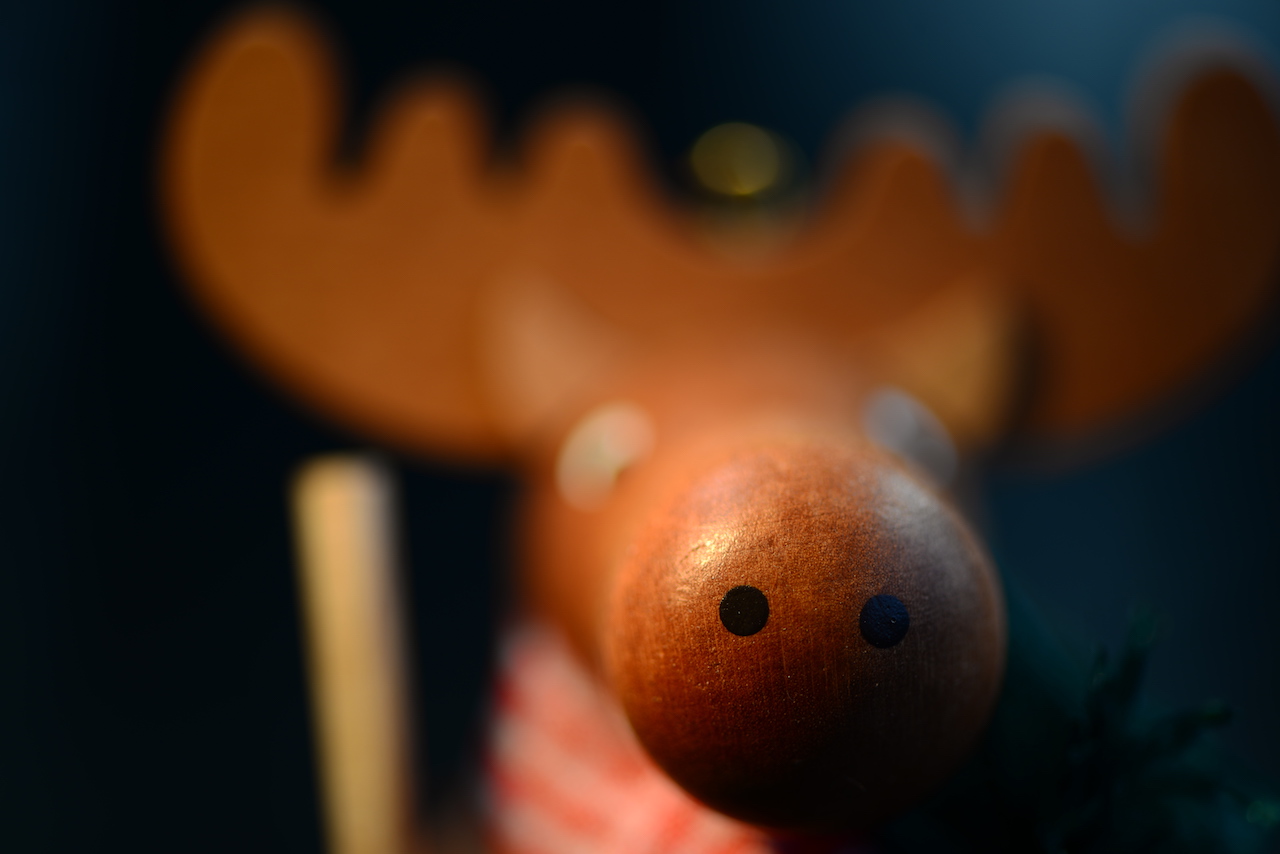 If you want more in focus, we need to increase the aperture. Here it is f/18, and it is still not enough actually.
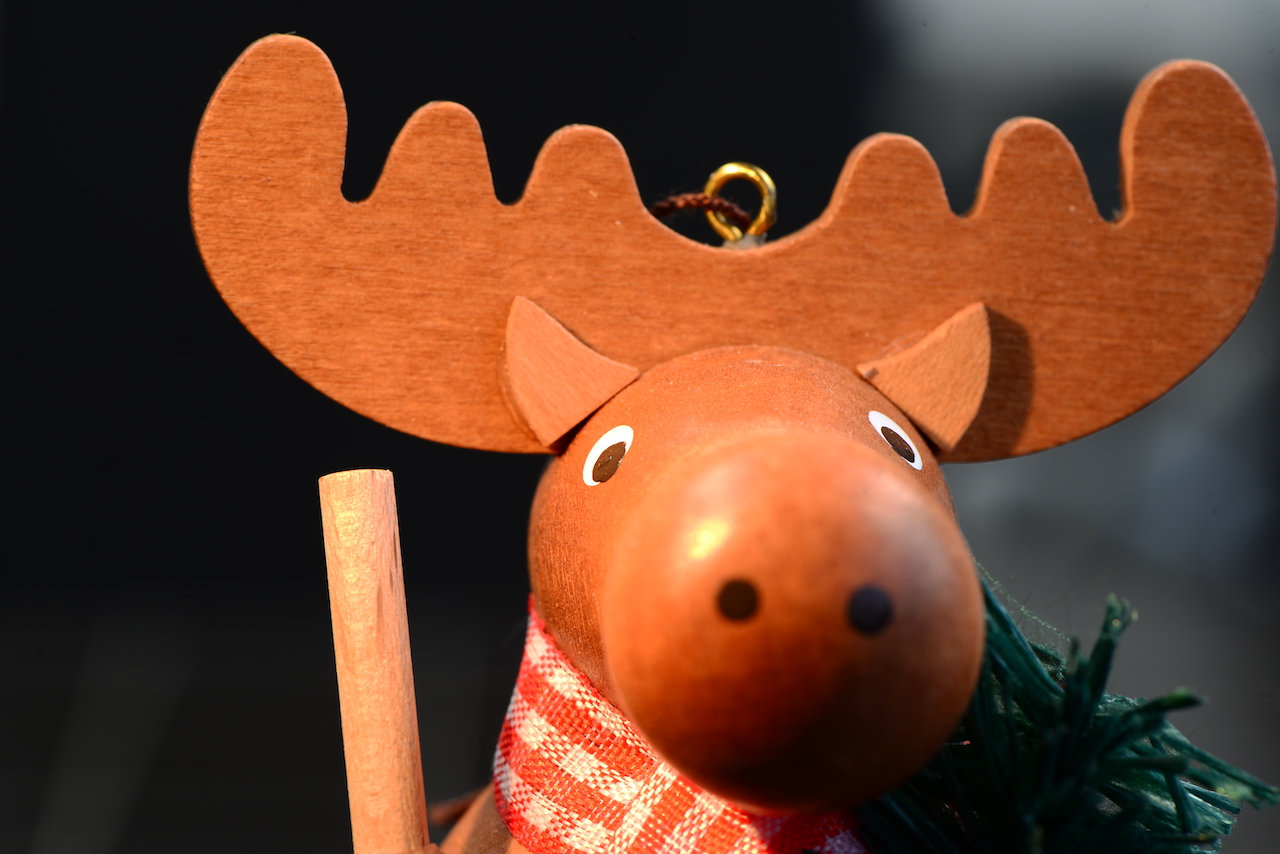 The price you pay when you increase the aperture is speed, that you have to compensate with exposure time and/or ISO.
Depth of field depends on the focus distance
The depth of field at a given aperture is more or less a fraction of the distance around where you focus. If you are focusing close, the depth is very shallow. If you are further away, for the same aperture you have more depth. If you focus about 8-10m away, then you will have everything in the background also sharp in the frame.
This is why being further away from your subject helps you take pictures of people in front of a background easier, but you may need to use a longer lens. In the same way, cellphones have tiny sensors, much shorter focal lengths, and comparatively something that is 1.5 to 2m away is far away to allow everything to be in focus.
The pictures below illustrate this effect. They have been taken with a Nikon 105 macro that can focus very close
This is a shotglass that is about 80cm away shot using a macro to exaggerate the effect a bit.
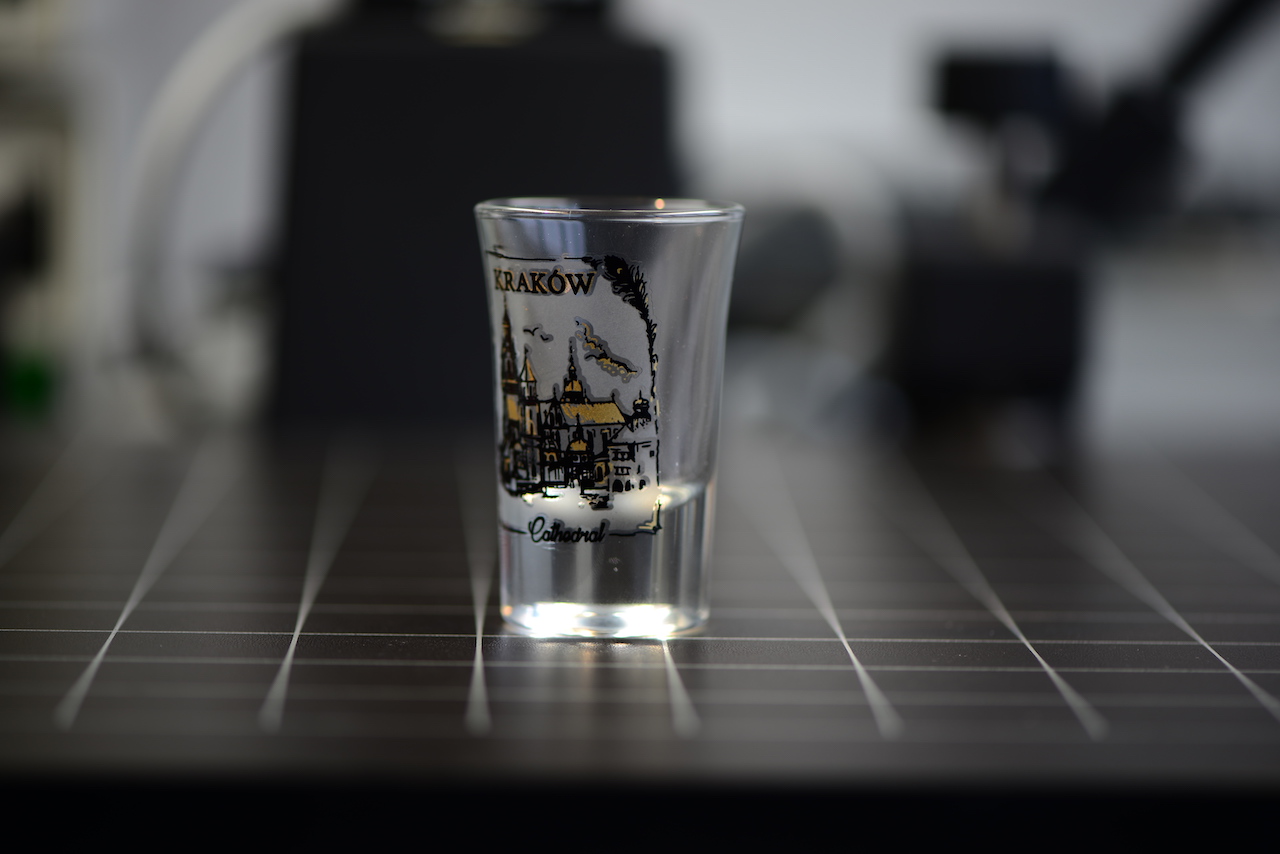 The first picture uses f/3 and notice that the background is completely blurred. However the writing on the glass is in focus.
The second picture uses f/18 now much more of the background is visible
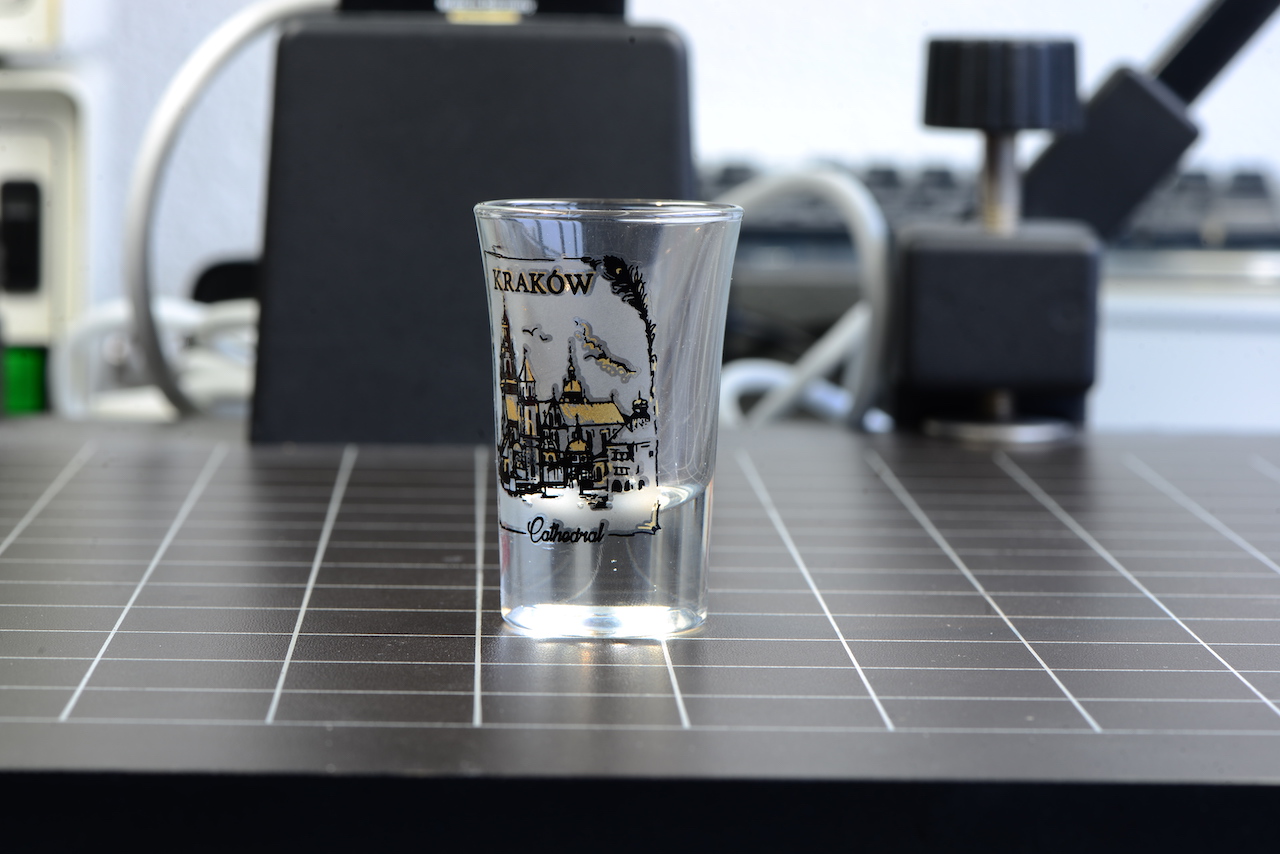 We simply increased the depth of field with aperture. The price is again speed.
This is the exact same setup and glass, but now we are much closer at about 35cm.
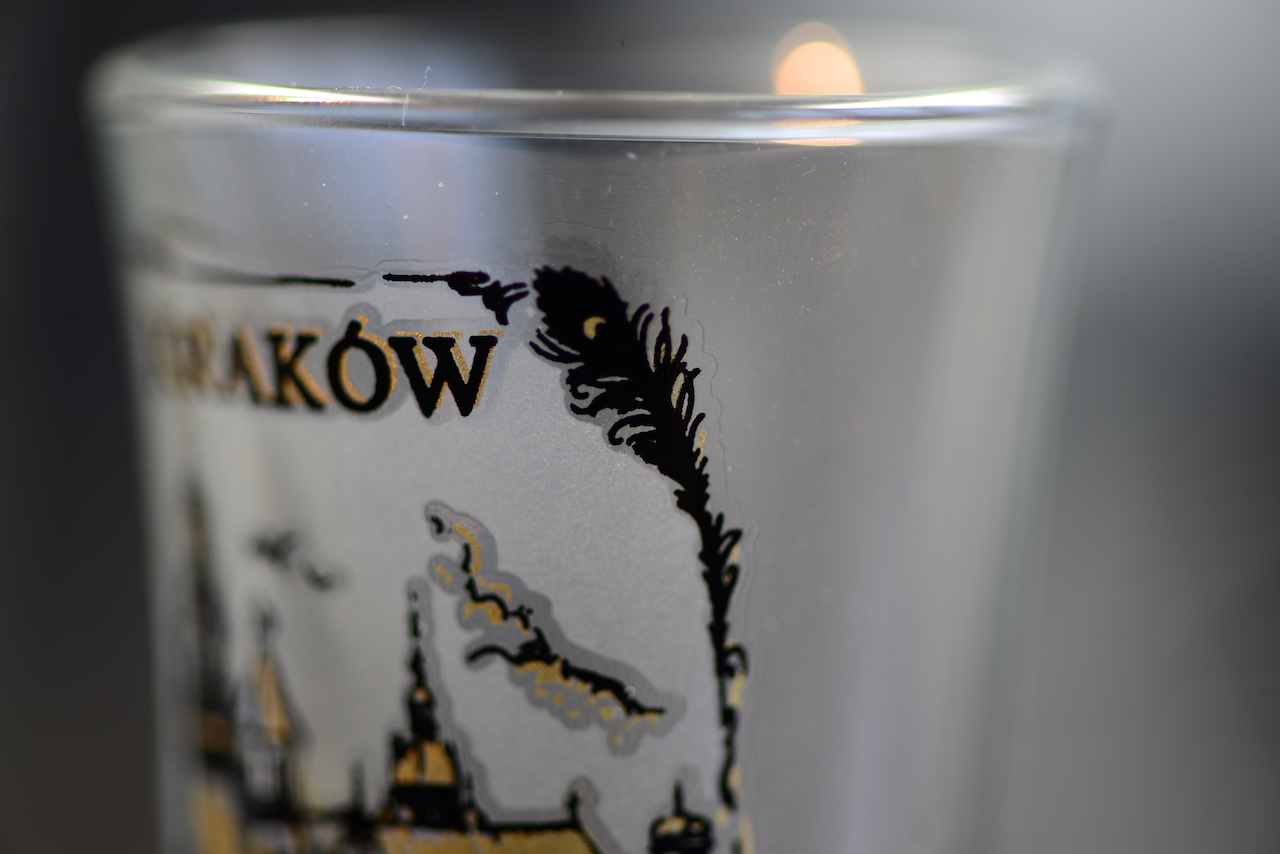 Technically this is even less open at f/4 but only a small portion of the text on the glass is in focus.
Even when we get to f/18 not all of the writing stays in focus.
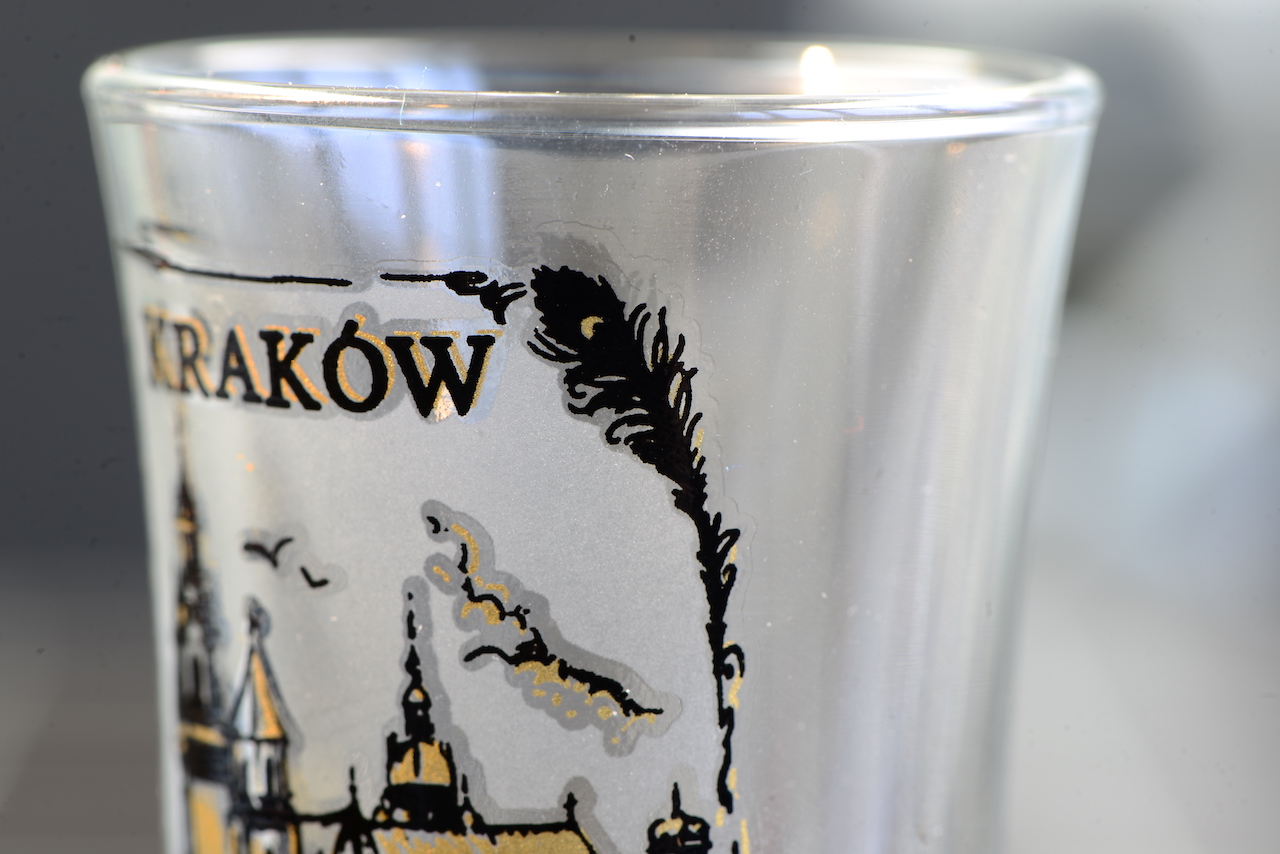 Compare to the other (far) set and you will see that we have less of the glass in focus with f/18 then we had in f/3.5
More example pictures
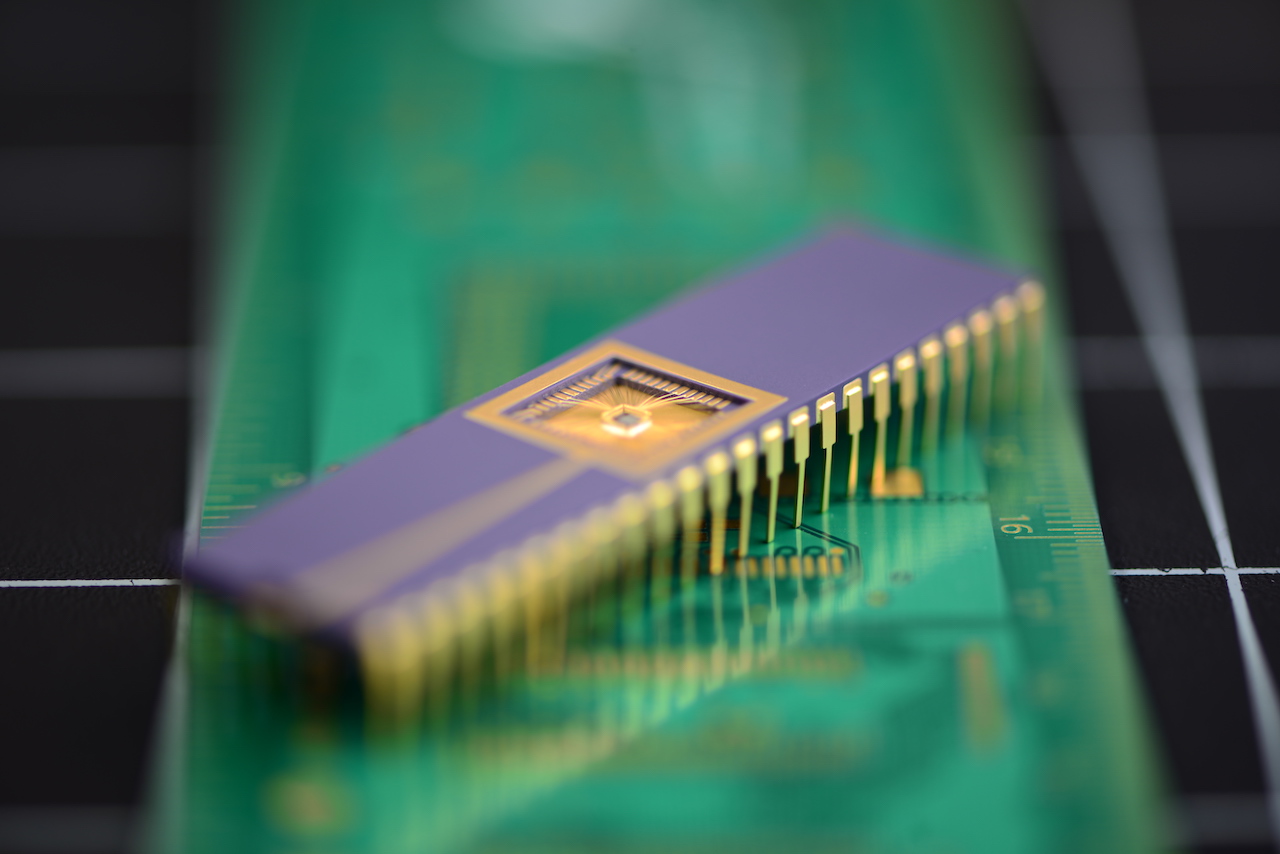
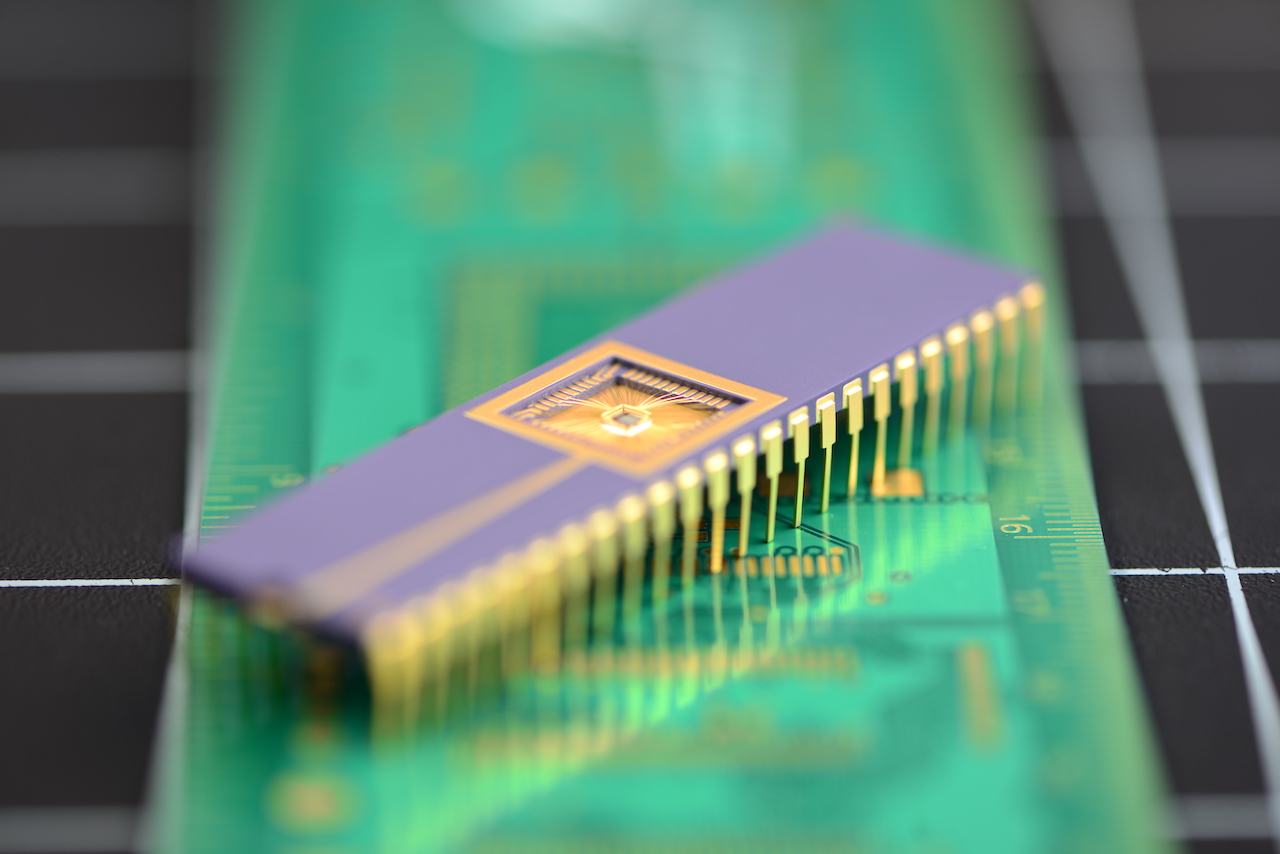
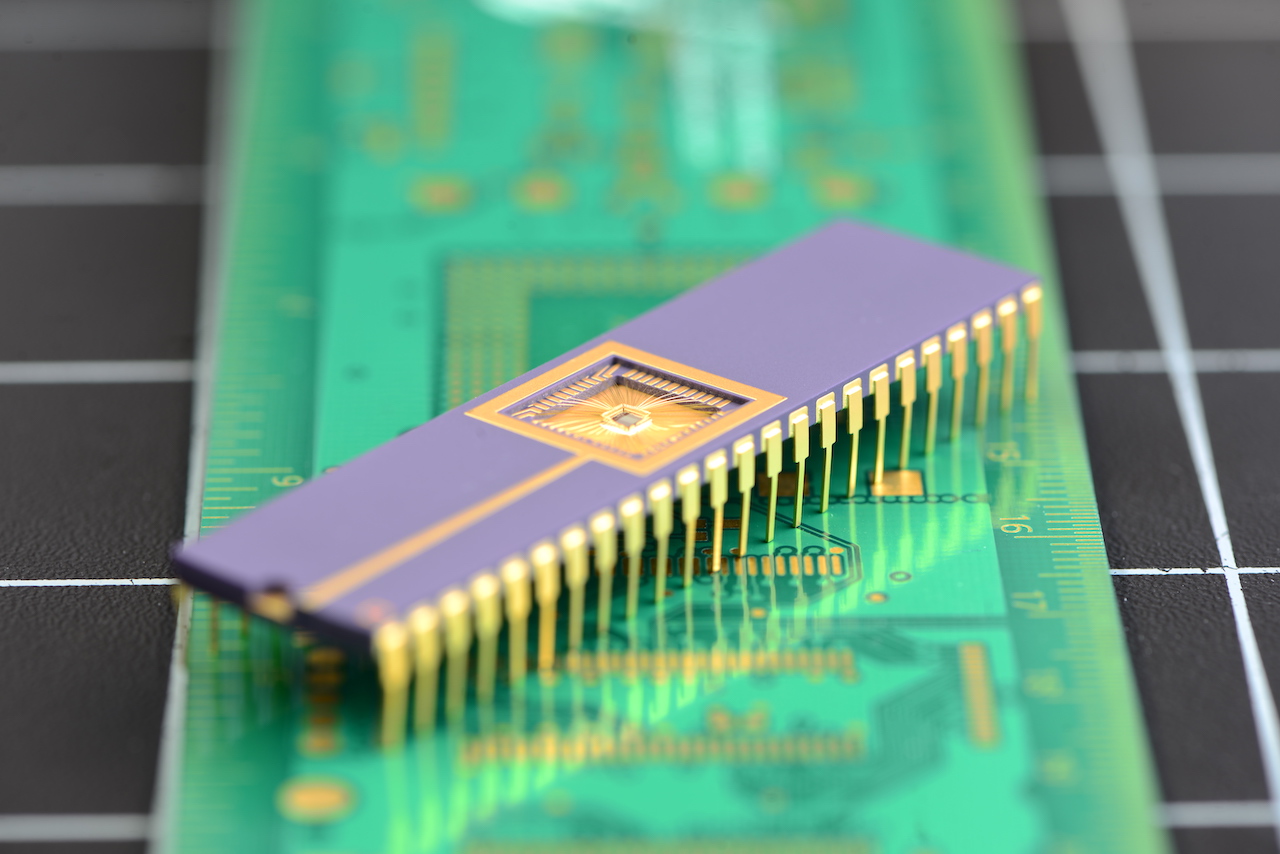
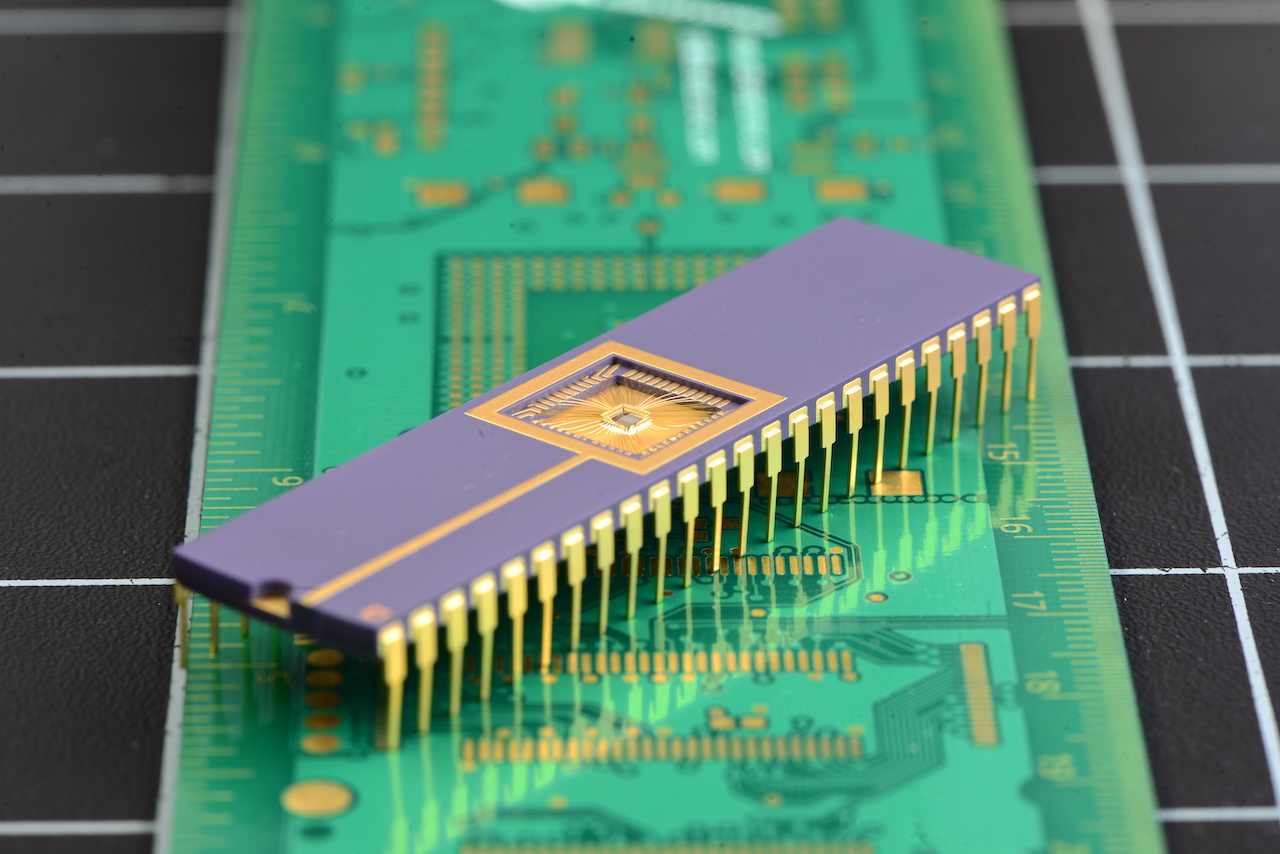
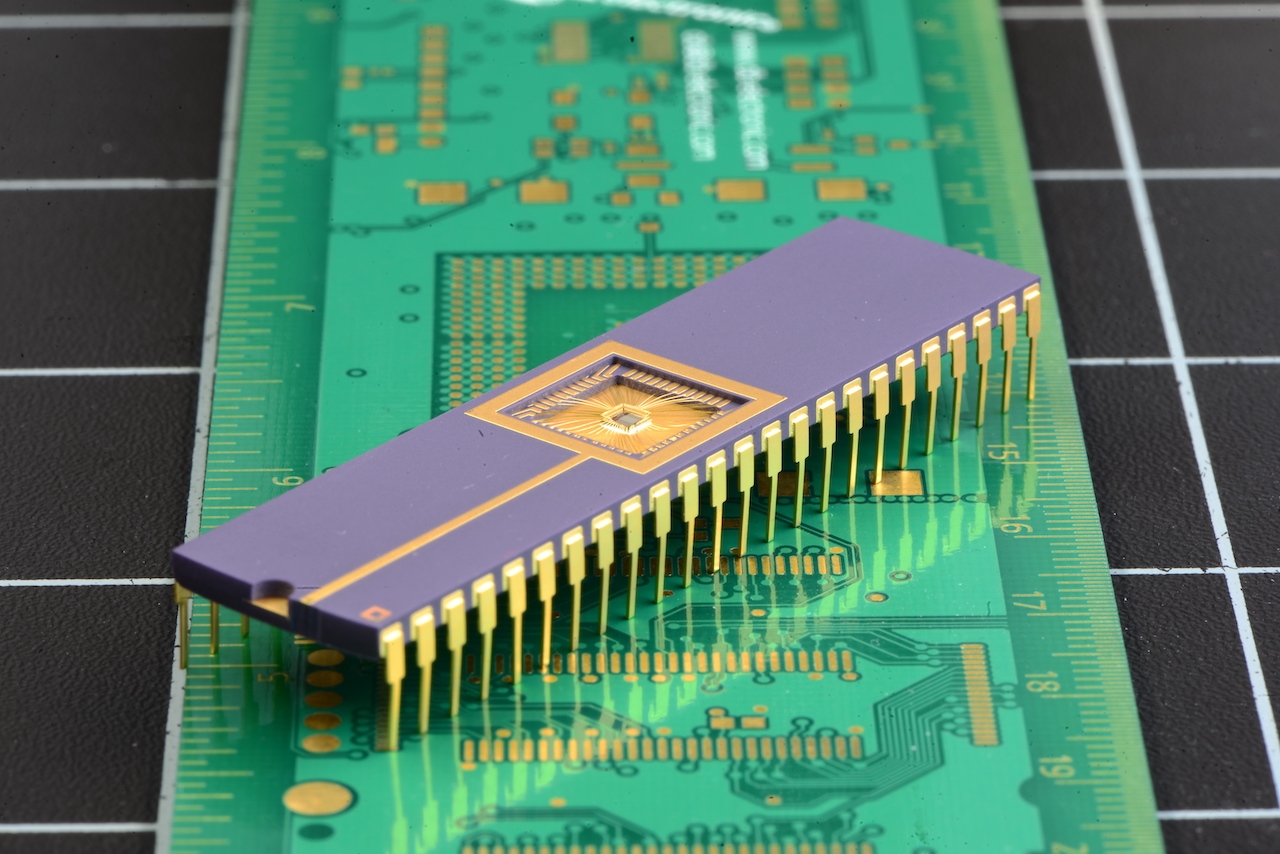
You will see the interplay between the aperture and depth of field. Just look at the right hand side for the distance markers on the green ruler (they are in mm scale), to see what is in focus.
These pages are for Amateur Photographers and not really for seasoned photographers and professionals. I have no affiliation or commercial interest with any brand/make. I write from my own experience. I ended up using mainly Nikon, so I am more familiar with this brand than others. See price for notes on pricing as well as photography related links.

