Processing
What happens after you take the image
Photography does not have to end with you pressing the shutter button. Processing is the part of the process that comes after light hits the sensor. You may like to use more or less of it, that is a choice, but knowing what you can do is important.
Image processing is basically done for three different purposes
- Fixing problems with your pictures. For example color correction or fixes for distortion as seen in the example on this page. These are technical issues that you could have probably fixed with a better setup, or simply by having a bit more time.
- Enhancing the image you have taken, the simplest is probably cropping. These processing techniques end up producing a better image, it is not necessarily that the initial image had any (technical) flaws to start with.
- Part of an artistic process, which this www site is not really suited to explain. You just end up creating with the tools that are used for image processing.
Personally I do not enjoy processing as much, I would much rather be taking photographs, instead of sitting in front of a computer. But I know people who use processing so that they can spend less time on one shot trying to get it right, knowing that they can fix issues later. This gives them more time to shoot different things.
There is no right or wrong. But knowing what you can do will help you, so even if you do not over use it, just knowing what is fixable, what can be enhanced in your picture can help you to become a better photographer.
You can certainly do substantial changes to an image through processing that goes beyond repairing. But anything you do with the image is just as part of the process as something else. Even things that do not look like it like, choosing (or even engineering) the light, the camera options, the file type used to save the image will be adding some processing.
The first time you see a HDR (High Dynamic Range) image, most people like it. Once you see it 1'000 times, it sort of loses its sparkle. This doesn't mean that it should not be used (who am I to tell anyone what to do), but part of what makes some of these effects interesting is that at first sight they are different. They end up losing this novelty quite fast, this is when you know that you have over done it :). You could end up using HDR for all your images, but if the only thing that makes the picture fun for you and interesting for others is the fact that it was made with one effect, there is a chance that it will lose this charm at some point.
Take the brilliant Cindy Sherman as an example. The untitled series, from a technical gimmick point of view, uses the same trick (she frames herself in the pictures), but it is not this technical part that makes her pictures interesting (at least for me). I do not say, so what she photographed herself a bunch of times. Of course, Cindy Sherman is an artist, not an amateur photographer, but I think it illustrates the point well. (I could have also used Yann Arthus-Bertrand the guy that shoots things from above)
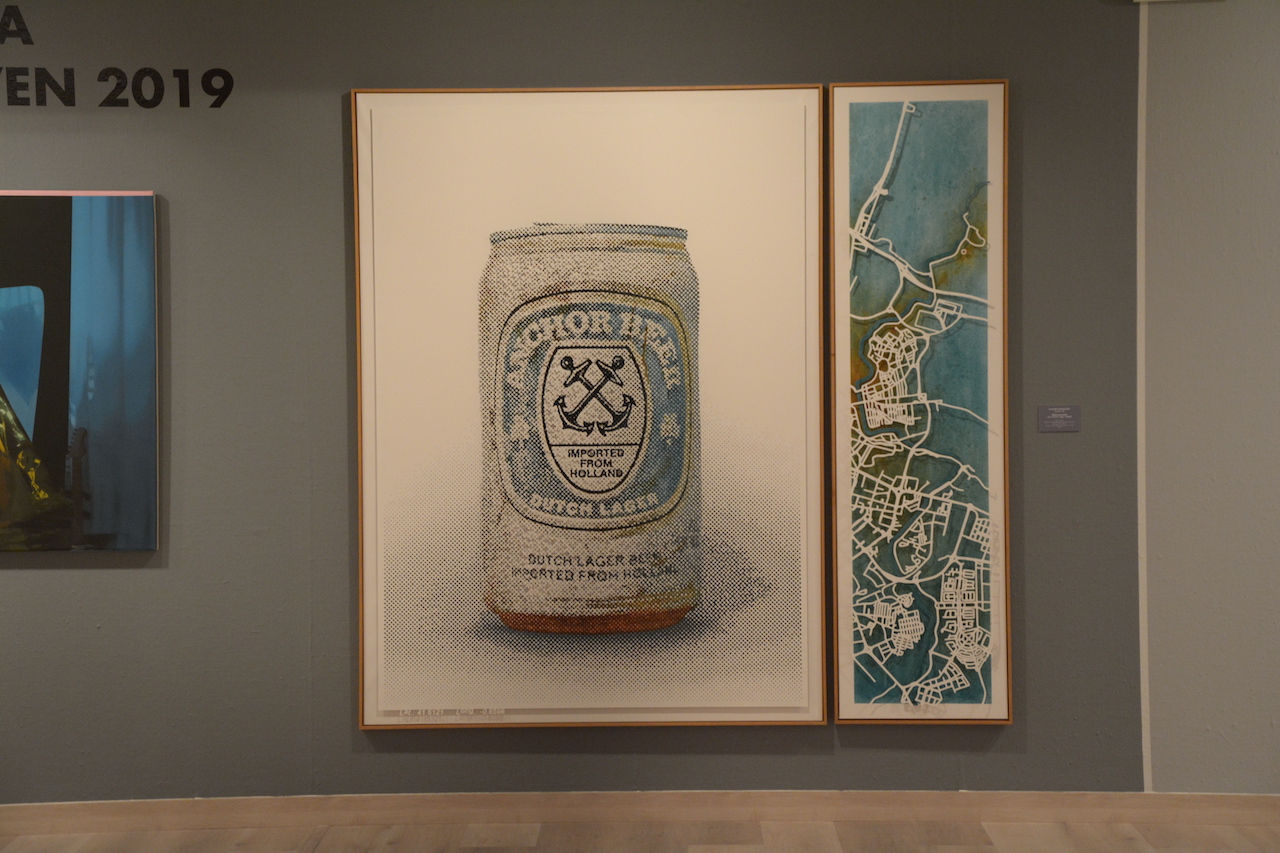
I took this picture in a gallery, hand held, bad light, and did not have the time to properly make all the adjustments. The art is from Alejandro AZÓN BALLARÍN, truly amazing piece, but this shot really does not do justice.

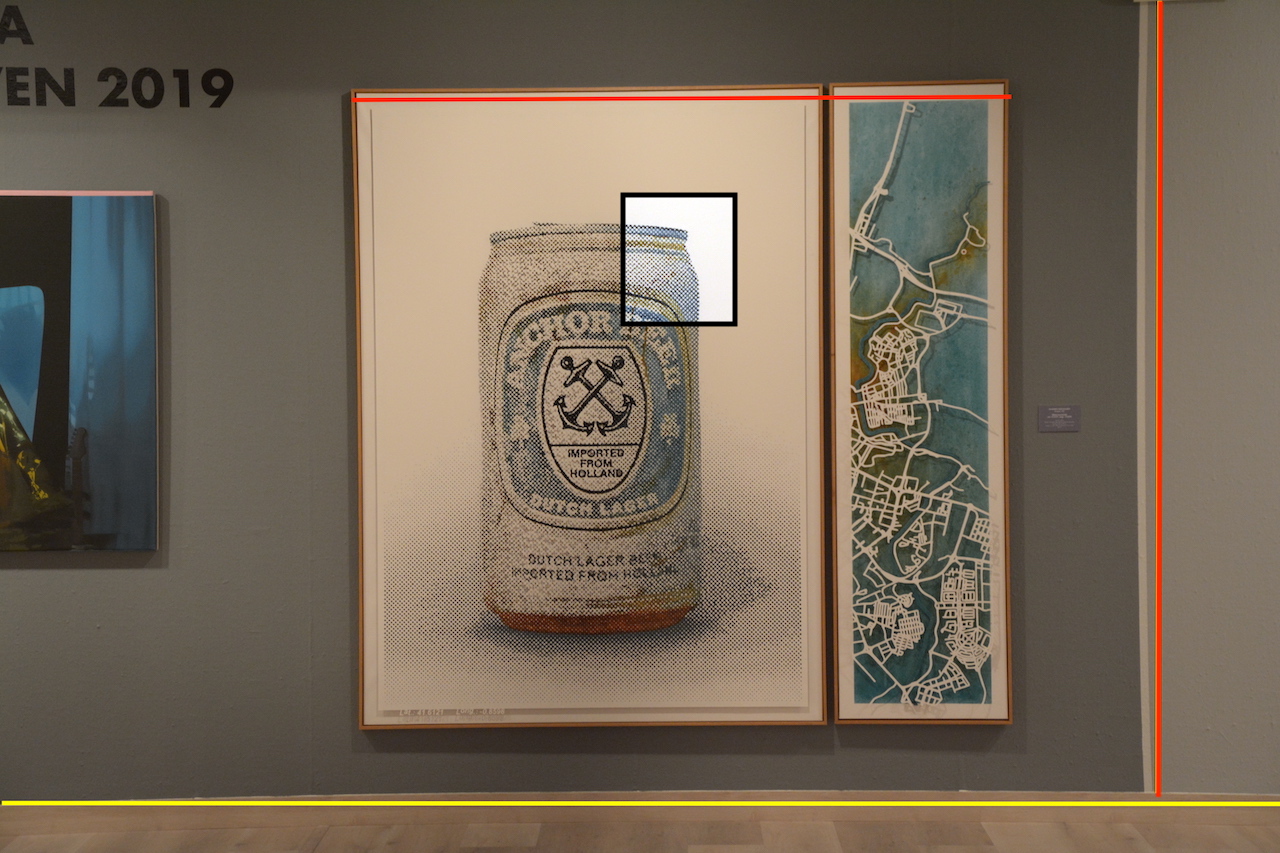
There are so many things wrong here. I added a couple of lines to highlight the problems a bit more..

- The white balance is completely off, the background of the picture is supposed to be white but ended up a light mocha color. You could maybe blame part of it to the light inside the gallery, but it is way off. (black rectangle)
- I am holding the camera slightly tilted. Left side is lower than the right (yellow line)
- The trusted but simple Nikon 18-105 has a bit of pincushion distortion. (red lines)
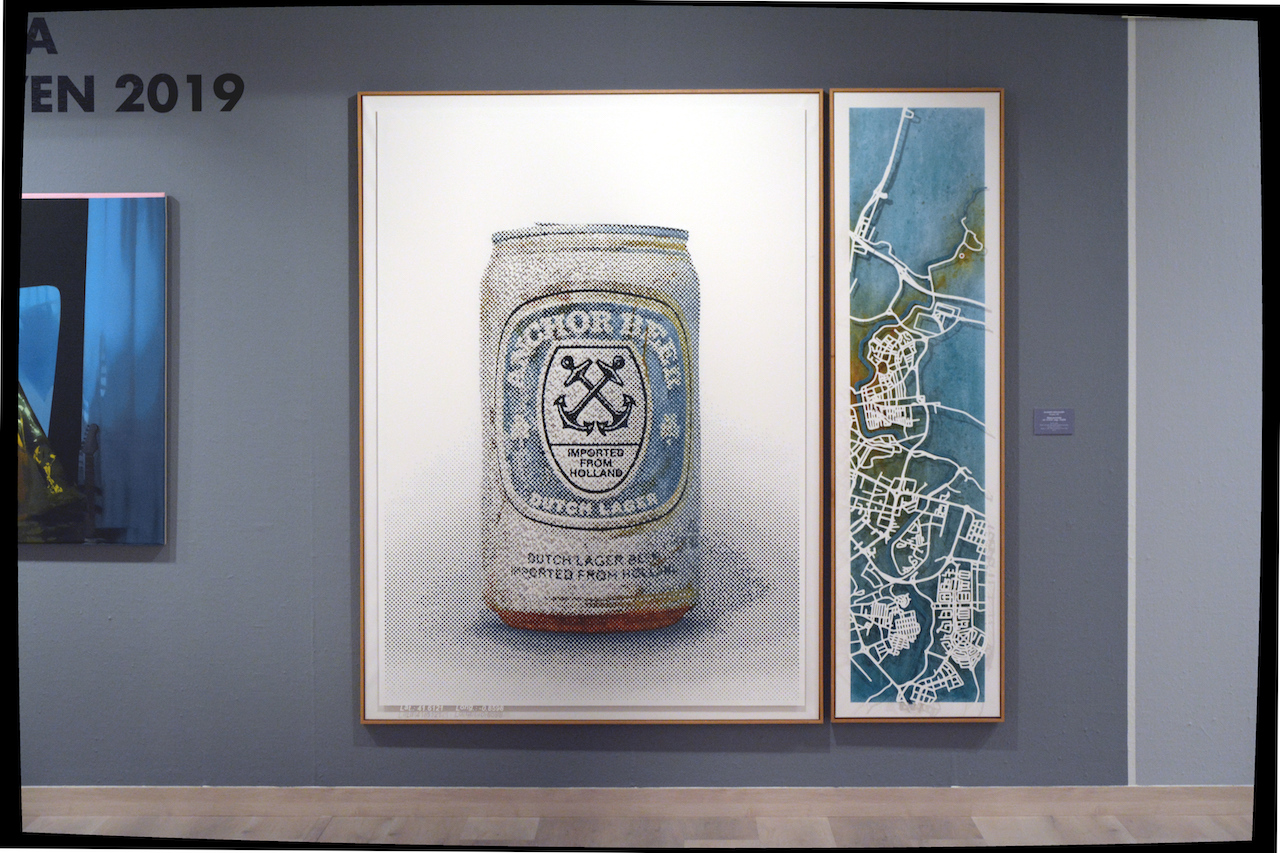
It is amazing how easily these can be fixed. Although I am someone that rarely uses post-processing, it took a couple of minutes with GIMP to get the following

- The first fix was Colors → Auto → White Balance
- Next up is the distortion, Filters → Distorts → Lens Distortion and only playing with the Main parameter was sufficient to fix the pincushion
- And the last is to rotate the image slightly SHIFT-R
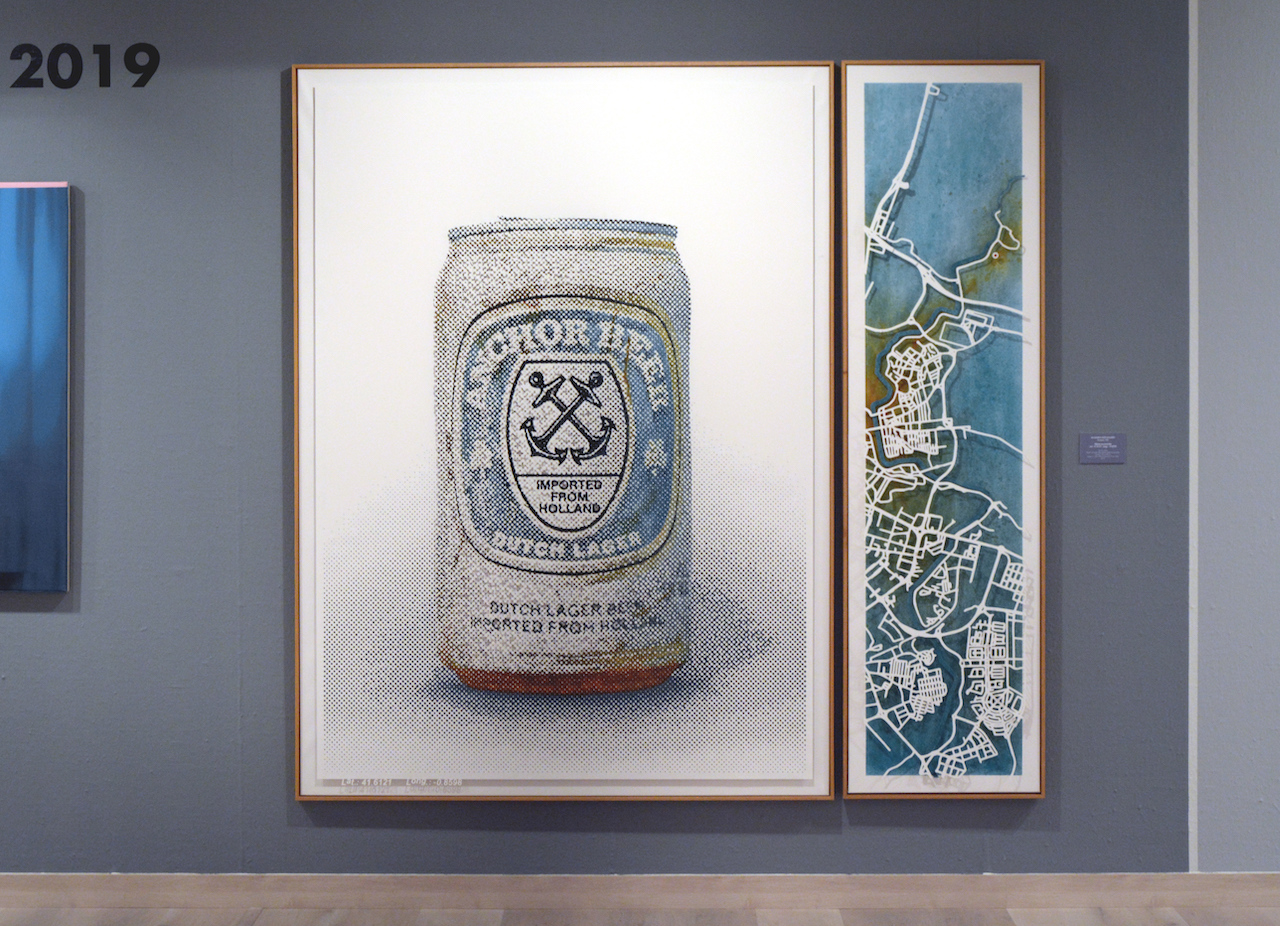
Now when you look at this image above you realize that all these modifications have distorted the edges of the picture, so the idea is to crop the image a bit to get the final result.

So now we have corrected the mistakes we have made or could have avoided. Is this really bad? Photography is supposed to be fun, you may not have the time or interest to get every detail of the picture adjusted so that when you press the shutter button the perfect image appears as a file in your camera. So you can decide to spend additional time after you have taken the image.
While how much you use is up to you, knowing what image post processing tools are capable of is important. That helps you while taking your pictures (or buying equipment).
These pages are for Amateur Photographers and not really for seasoned photographers and professionals. I have no affiliation or commercial interest with any brand/make. I write from my own experience. I ended up using mainly Nikon, so I am more familiar with this brand than others. See price for notes on pricing as well as photography related links.